
Where to find and how to farm for Scorchbeasts and Scorchbeast Meat in Fallout 76
- Duchess Flame
- May 31, 2022
- 9 min read

Updated: Feb 7, 2025

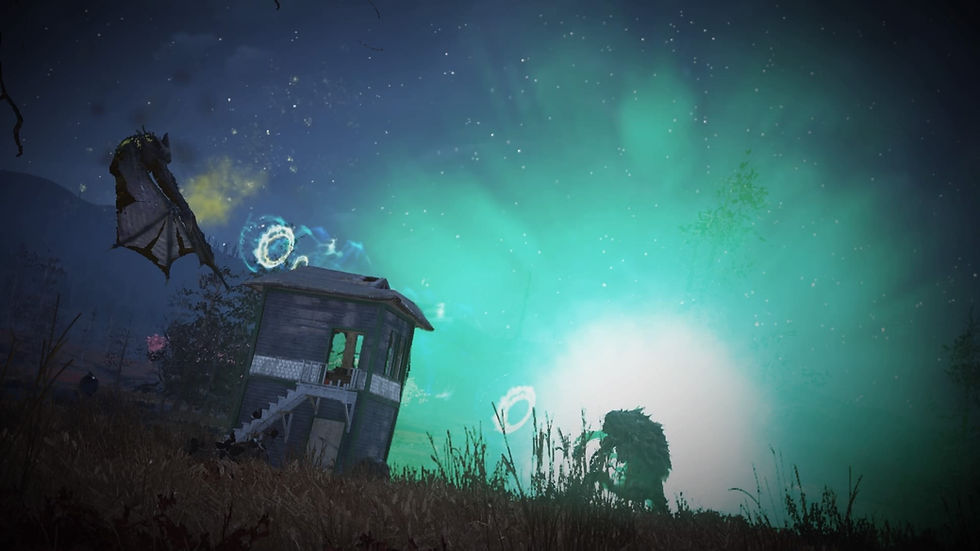
Image Credit: Katie Key
Used for
Challenges
Take a Camera Photo of a Scorched Creature
Kill Huge Monsters
Complete the Event Scorched Earth
Kill a World Boss
Sell Scorchbeast Steak
Take a Camera Photo of a Legendary Scorched
Kill a Scorchbeast
Kill the Scorchbeast Queen
The Order of the Tadpole
Tadpole Badge - Cook - Cook a Cranberry Meatball Grinder
Quests
Officer on Deck - Kill 10 Scorchbeasts or Legendary Creatures
Belly of the Beast
Food Buffs
Broiled Scorchbeast Brain
Charred Scorchbeast Liver
Cranberry Meatball Grinder
Roasted Scorchbeast Heart
Scorchbeast Steak
Smoked Scorchbeast Lung
Scorchbeast Mixed Meat Stew

Scorchbeasts can drop the following items
I will not be listing everything that a Scorchbeast can drop, as it's a long list. I will only list the more useful items.
Item | % Drop Chance |
Scorchbeast Hide | 33.33% |
Scorchbeast Wing Fragment | 33.33% |
Scorchbeast Bones | 33.33% |
Scorchbeast Meat | 20% |
Scorchbeast Liver | 20% |
Scorchbeast Heart | 20% |
Scorchbeast Brain | 20% |
Scorchbeast Lung | 20% |
Scorchbeast Queen
The Scorchbeast Queen has two loot pools.
The first loot pool has a 20% chance to be the Scorchbeast meat part that you want.
The second loot pool has a 36% chance to be the Scorchbeast meat part that you want.
This means she will always drop two Scorchbeast Pieces. It could be a liver and a lung one time or two pieces of meat the next time.
Item | % Drop Chance |
Scorchbeast Hide | 55.55% |
Scorchbeast Wing Fragment | 55.55% |
Scorchbeast Bones | 55.55% |
Scorchbeast Meat | 20% + 36% |
Scorchbeast Liver | 20% + 36% |
Scorchbeast Heart | 20% + 36% |
Scorchbeast Brain | 20% + 36% |
Scorchbeast Lung | 20% + 36% |
Prime Plans
These plans will stop dropping once learned.
Item | % Drop Chance |
Plan: Prime Automatic 10mm Receiver | 0.132% |
Plan: Prime 10mm Receiver | 0.132% |
Plan: Prime 10mm Submachine Gun Receiver | 0.132% |
Plan: Prime .44 Receiver | 0.132% |
Plan: Prime 50 Cal Machine Gun Receiver | 0.132% |
Plan: Prime Automatic Assault Rifle Receiver | 0.132% |
Plan: Prime Assault Rifle Receiver | 0.132% |
Plan: Prime Automatic Combat Rifle Receiver | 0.132% |
Plan: Prime Combat Rifle Receiver | 0.132% |
Plan: Prime Combat Shotgun Receiver | 0.132% |
Plan: Prime Crossbow Receiver | 0.132% |
Plan: Prime Western Revolver Receiver | 0.132% |
Plan: Prime Double-Barrel Shotgun Receiver | 0.132% |
Plan: Prime Enclave Plasma Gun Receiver | 0.132% |
Plan: Prime Gatling Gun Receiver | 0.132% |
Plan: Prime Gatling Laser Receiver | 0.132% |
Plan: Prime Gatling Plasma Receiver | 0.132% |
Plan: Prime Gauss Rifle Capacitors | 0.132% |
Plan: Prime Handmade Rifle Receiver | 0.132% |
Plan: Prime Automatic Handmade Rifle Receiver | 0.132% |
Plan: Prime Hunting Rifle Receiver | 0.132% |
Plan: Prime Laser Gun Receiver | 0.132% |
Plan: Prime Lever Gun Receiver | 0.132% |
Plan: Prime Light Machine Gun Receiver | 0.132% |
Plan: Prime Minigun Barrel | 0.132% |
Plan: Prime Pipe Bolt-Action Receiver | 0.132% |
Plan: Prime Pipe Gun Receiver | 0.132% |
Plan: Prime Automatic Pipe Gun Receiver | 0.132% |
Plan: Prime Pipe Revolver Receiver | 0.132% |
Plan: Prime Plasma Gun Capacitor | 0.132% |
Plan: Prime Pump Action Shotgun Receiver | 0.132% |
Plan: Prime Radium Rifle Receiver | 0.132% |
Plan: Prime Automatic Radium Rifle Receiver | 0.132% |
Plan: Prime Railway Rifle Receiver | 0.132% |
Plan: Prime Single Action Revolver Receiver | 0.132% |
Plan: Prime Submachine Gun Receiver | 0.132% |
Plan: Prime Ultracite Gatling Laser Receiver | 0.132% |
Plan: Prime Ultracite Laser Gun Receiver | 0.132% |
Other Plans
Item | % Drop Chance |
Plan: Vault 76 Jumpsuit | 0.001% |
Plan: Marine Wetsuit | 0.017% |
Plan: Marine Tactical Helmet | 0.015% |
Plan: Harness | 0.001% |
Plan: Long Johns | 0.001% |
Plan: Raider Leathers | 0.001% |
Plan: Road Leathers | 0.001% |
Plan: Flannel Shirt and Jeans | 0.001% |
Plan: Undershirt & Jeans | 0.001% |
Plan: BOS Knight Uniform | 0.015% |
Plan: BOS Officer Uniform | 0.015% |
Plan: BOS Soldier Uniform | 0.015% |
Plan: Cryo Grenade | 0.133% |
Plan: Pulse Grenade | 0.133% |
Plan: Cryo Mine | 0.133% |
Plan: Nuke Mine | 0.133% |
Plan: Pulse Mine | 0.133% |
Plan: Nuka-Cola Grenade | 0.267% |
Plan: Nuka Quantum Grenade | 0.267% |
Plan: MIRV Frag Grenade | 0.427% |
Junk
Item | % Drop Chance |
Waste Acid | 0.056% |
Excess Adhesive | 0.056% |
Aluminum Scrap | 0.167% |
Copper Scrap | 0.056% |
Glass Shards | 0.056% |
Loose Screws | 0.056% |
Fiberglass Spool | 0.056% |
Farming Tips and Tricks
The following perk cards, magazines, and/or backpack mods will increase your yields.

Vendors and Camp Allies
Vendors and Camp Allies do not sell raw or cooked Scorchbeast pieces. However, some players will sell the meat to the Watoga Vendors after a Queen so it can be worth checking their inventory.
Cranberry Meatball Grinder
Whitesprings Restaurant - 26.14%
Grandma Junko - 19%
Scorchbeast Mixed Meat Stew
Events
Line in the sand

It's A Trap
This event will not appear on your events tab until your character has completed the Questline Early Warnings.

This event has a two-hour cooldown period.
Event Locations:
Ash Heap
The Mire
Cranberry Bog
Surface to Air

Event Locations:
Cranberry Bog
Firebase LT
Firebase Major
Forward Station Alpha
The Thorn
Firebase Hancock
Survey Camp Alpha
Defend workshop events
Event Locations:
Savage Divide
The Mire
Cranberry Bog
Scorched Earth

Pip-Boy Dailys
Heart of the Enemy
Retrieve Viable Scorchbeast DNA to put in the Centrifuge.

Scorchbeast Nests
Scorchbeast Nests are part of your pick-up history list. If you don't know what that means, then have a read over this guide and then come back.
Butcher's Bounty and Backwoodsman 1 magazines do not work on Scorchbeast Nests.
Drop Rates:
Scorchbeast Brain - 20% chance
Scorchbeast Liver - 20% chance
Scorchbeast Heart - 20% chance
Scorchbeast Meat - 20% chance
Scorchbeast Lung - 20% chance
Watoga Municipal Center
5x Scorchbeast Nests

You will need to enter the building and work your way to the top to check these nests, however, there are also 4 rare coloured baseball bat spawns in this building. If you follow the route for the 4 baseball locations in there, then it will also get you to the top of the building.

Watoga Civic Center
3x Scorchbeast Nests

The roof of the civic center can be accessed from the outside. There will be some Super Mutants with miniguns and mutant hounds up here.
There are 2 nests in the area marked with a 1, you just have to very slowly move your cursor around to catch the one underneath.

Vault 96
1x Scorchbeast Nest
This is the same location that you visit for the settlers during the New Arrivals questline.

When facing the Scorchbeast corpses, turn North and walk straight until you get to the edge of the cliff. Look down and slowly walk back towards the Scorchbeast corpses, you will see the nest on the ledge below you.

Scorchbeasts Corpses
These are corpses placed in the game, not to be confused with the corpses of Scorchbeasts killed by other players.
Scorchbeast Corpses are part of your pick-up history list. If you don't know what that means, then have a read over this guide and then come back.
Butcher's Bounty and Backwoodsman 1 magazines do not work on Scorchbeast Corpses.
Drop Rates:
50% chance for the corpse to be empty
Scorchbeast Brain - 20% chance
Scorchbeast Liver - 20% chance
Scorchbeast Heart - 20% chance
Scorchbeast Meat - 20% chance
Scorchbeast Lung - 20% chance
Carleton Mine.
2x Scorchbeast Corpses.
Put a map marker in the same place as my character marker on the map below.
This is the same location that you visit for the raiders during the New Arrivals questline.


Vault 96
2x Scorchbeast Corpses
Put a map marker in the same place as my character marker on the map below.
This is the same location that you visit for the settlers during the New Arrivals questline.

Glass Caverns
6x Scorchbeast Corpses

The corpses are all down towards the end of the cavern. Keep an eye out for some Mirelurk Kings on the way down and the rare baseball bat spawn by the front door.

Fissure Sites
Fissure Sites will spawn one Scorchbeast every 18 minutes.
If you run the below route, then the first fissure site will be ready to spawn another Scorchbeast by the time you have cleared the last location.
Start at the Fissure site near Miners Monument

The Fissure Site near Strikers Row - No longer a Fissure Site. This is now the location of the Gleaming Depths Raids.

Fissure Site near Survey Camp Alpha

Fissure Site Prime

Fissure site near Mac's Farm

Fissure Site near Moss Town

Fissure Site near the Pumpkin House

and end with the Fissure Site near Vault 79

Random Encounters
Scene
Scene Random Encounter location guide here.

Scorchbeast Attack - Cranberry Bog only
Scorchbeast Fly Over - Ash Heap, Savage Divide, The Mire, and Cranberry Bog only
Unaggressive Scorchbeast - Forest only
How to build and use an MTU
If you are new to the Wasteland and struggling to complete challenges or need to hunt large amounts of Scorchbeast parts and don't want to use up all your ammo, then using a Mobile Turret Unit may be of assistance.
You may need to shoot at the Scorchbeast a few times and lead it over to your MTU so it is within range of the turrets.
Remember to get some tags on the Scorchbeast before it dies, so you can loot it afterwards.
Be discreet when using these. Try and only use them on private servers.
You will need:
An empty camp slot
Flamethrower Trap
Perk Card - Contractor Rank 2
Perk Card - Home Defense Rank 3
Step 1
Build one Concrete Foundation.

Step 2
Build one set of Stairs.

Step 3
Build one Wood Upper Floor and attach it to the top of the first set of stairs.

Step 4
Build four Half Wood Upper Floors, two on each side of the Wood Upper Floor.

Step 5
Build a Utility Box Generator - Fusion in the middle of the Wood Upper Floor.
You can use any Generator, as long as it fits on the Wood Upper Floor and produces 20+ power.

Step 6
Build three Wall - Halfs around the generator.

Step 7
Use the Flamethrower Trap to destroy the walls and the generator.

Step 8
Build a second set of Stairs.

Step 9
Build one Half Wood Upper Floor and attach it to the top of the second set of stairs.

Step 10
Build four Half Wood Upper Floors, two on each side of the Half Wood Upper Floor.

Step 11
Build two Daring Heavy Cryo Turrets, one on each end of the top row of Half Wood Upper Floors.
If you don't have the Daring Cryo Turrets unlocked, two Heavy Machinegun Turrets or two Heavy Laser Turrets will also work here.

Step 12
Build Conduits along the back of each floor level. Try and keep in mind where the Turrets will be placed when you are placing the conduit. Run the conduits as far back on the floor as you can.
You can place the conduits any way that you like, just keep in mind that they can be damaged so keep them as clean and neat as possible.
You can just connect the Turrets to the generator by using wires but it makes the MTU look messy and if one Turret breaks then you have lost use of all the Turrets.
You will need to use the proper conduits that go through walls to connect the bottom row of Turrets to the generator, otherwise you won't be able to place the MTU in the future.

Step 13
Build eight Enclave Polished Steel Heavy Laser Turrets.
Place four on the bottom floor and four on the top floor, evenly spread out as in the picture.
Make sure they are all facing one way. Ideally, they need to be facing away from the stairs.
If you do not have either of the Enclave Skins for your turrets, then the standard Heavy Laser Turrets will work fine.

Step 14
Repair just the generator and connect the conduits and wires to the generator.
Step 15
Make sure all the turrets have power and are moving. Once you are happy that everything is working then find your CAMP module and repair all.

Step 16
Take your MTU out for a test drive and make sure that you can place it.
Step 17
Fast travel to all marked Fissure Sites on the map, place your MTU, and start farming.

Additional Tips
Once you have built your MTU and it won't place, it's either a camp item or poorly placed conduit. You will need to scrap the MTU and rebuild it.
If you are not a combat-ready player, you may need to repair the turrets mid-battle. I recommend placing the CAMP module near the base of your MTU where you can find it quickly and easily.
Build a traveling workshop on one foundation. Keep it simple and avoid skins as they may not place.


Love food buffs?
Join us at Buffs n Brew, a group dedicated to food buffs and food buff farming.
Discord - All Platforms
Facebook - PC
Facebook - XBOX
Facebook - PlayStation (Opening July 2024)

Hi, I'm Kat or Duchess
I'm an Australian data miner who writes farming, event, and food buff guides for Fallout 76.
I believe that all knowledge and information should be free, which is why my guides will never be locked behind a paywall. However, running a website and photo and video editing software does not come cheaply.
So, If you found my guides helpful, please consider buying me a ko-fi (coffee) using the link below.
All monies go towards the tools for writing my guides and maybe for an actual cup of coffee or 3 ;)
Alternatively, share my guides with your fellow vault dwellers and help them to survive the wasteland.


Comments