
Farming Guide: Deathclaw Eggs
- Duchess Flame
- Mar 11, 2022
- 8 min read

Used For
Daily Score
Collect Deathclaw Eggs (1)
Weekly Score
None
Lifetime Challenges
None
Mini Seasons
Collect a Deathclaw Egg with the Sunset Sarsaparilla Deputy Hat Equipped (3)
Recipes
Deathclaw Wellington
Deathclaw Egg Omelette
X can drop the following items
None
Farming Tips and Tricks
Deathclaw Eggs are a per-server, player-cell activated spawn.
If you do not know what that means, read the guide here first, then come back to this section.
You can farm Deathclaw Egg spawn locations in one of two ways.
Method 1: Solo Farming
Collect all available Deathclaw Eggs.
Visit the book house to reset your pickup history.
Server hop.
Collect the eggs again.
Visit the book house.
Server hop.
Repeat as needed.
Method 2: Two-Player Farming
This method yields more Deathclaw Eggs but requires two accounts or a friend.
For clarity:
You are Player 2
Your friend or second account is Player 1
Setup
Player 1 resets their pickup history.
Player 1 server hops to a fresh server.
Farming Loop
Player 1 fast travels to the first Deathclaw Egg location and stands next to the egg.
Player 2 waits until Player 1 is standing next to the Deathclaw Egg before fast travelling to the location.
Once Player 2 arrives, Player 2 picks up the Deathclaw Egg.
Player 1 fast travels to the second location and stands next to the egg.
Player 2 waits until Player 1 is standing next to the Deathclaw Egg before fast travelling to the second location.
Once Player 2 arrives, Player 2 picks up the Deathclaw Egg.
Repeat for the next location.
Once all locations are complete:
Server hop
Start again from the first location
Important Rules
Player 1 must not pick up any Deathclaw Eggs.
If Player 1 accidentally picks up an egg:
They must reset their pickup history
Server hop
Restart the entire run
Vendors, Camp Allies, and NPC's
There is an optional side quest available during the main questline Hunter for Hire, given by Duchess at the Wayward.
During this questline, Liebowitz can be found on the rooftops of Tyler County Fairgrounds. He asks the player to retrieve a Deathclaw Egg from Deathclaw Island.
The player can choose to keep the egg instead of handing it over to Liebowitz by passing specific SPECIAL stat checks.
Note: This quest is not repeatable.

Collectrons and CAMP Resources
Fetch Collectron Station
Obtainable via
Season 6 Scoreboard
Gold Bullion
Drop Rate
0.102%
Junkyard Dog Collectron Station
Obtainable via
Atom Shop
Drop Rate
0.102%
Random Encounters
Appalachia Locations Only
Deathclaw Nest vs Super Mutants
Deathclaw and Nest vs Merchant Caravan
Fixed Spawn Locations
External - a location that does not require a load screen to enter.
Internal - a location or instance that requires a load screen to enter.
Ash Heap

Tunnel of Love (Nuka World on Tour)
Internal
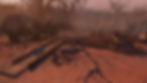
Deathclaw nests (4)
3% to 6% chance to spawn Deathclaw Eggs
These locations are accessible whether the event is running or not.
After entering the Tunnel of Love, face north and follow the train tracks until you reach the area with the pink heart lights. Turn left, pass the orange forklift, and stop at the second set of tracks. Turn left again and walk forward into a small cave. There are three nests in the pile on your right.

From there, turn around and follow the tracks to the end. Turn right and walk along the road wall until you reach some scaffolding with a wooden ramp leading up. Follow the ramp to the top of the scaffolding. At the top, turn left and follow the path until you see a break in the fence and a small cave on your left. Inside the cave, there is one Deathclaw nest to check.

Forest

Deathclaw Island
External
Deathclaw eggs (2)
Check the white suitcase on the side of the Deathclaw nest. Sometimes it can spawn additional Deathclaw eggs
The eggs can sometimes be hidden under the dirt when the Deathclaw pops out. I recommend leading the Deathclaw away from the nest before killing it, so you can loot the nest without the body getting in the way or covering the loot.


Arktos Pharma
External
Deathclaw egg (1)
From the fast travel point, run straight through the doorway to the bottom of the stairs. Turn left, pass the Nuka-Cola and Medical Supplies machines, and run up the stairs in front of you. Follow the corridor around, pass the Arktos Pharma sign, and enter the doorway on your left. Continue straight ahead and enter the second doorway on your left.
From there, head slightly right and walk through the gap in the wall directly opposite you. Jump down to ground level, turn around, and enter the doorway marked Protein Sequencing. Turn right and walk down the stairs. The Deathclaw Egg will be on the metal shelves in front of you.

Toxic Valley
None
Savage Divide

Hopewell Cave
External
Deathclaw Eggs (3)
Deathclaw nest (1)
3% to 6% chance to spawn Deathclaw Eggs
From the fast travel point, run straight across the road and enter the cave.
The first Deathclaw nest is on the left-hand side of the cave, just past the small pond of water near the entrance.

A Deathclaw Egg can spawn on top of this nest.

From the nest, turn and face east. Walk forward to the back of the cave until you reach a rock face. Turn left. A Deathclaw Egg can spawn behind the Firecracker Berry bush.

Next, turn and face west. Follow the edge of the pond as it curves around the cave. Continue along the water until you see a small campfire and a sleeping bag. Behind the sleeping bag, against the rock face, and to the left of a Firecracker Berry bush, you will find the final Deathclaw Egg spawn for this area.


Monorail Elevator
External
Deathclaw egg (1)
Note: You will need the Marsupial mutation to access this location.
From the fast travel point, follow the road until you reach the main pillar with the elevator at the bottom. Enter the elevator and select floor 2. Make sure you press 2, as selecting the wrong floor will take you to a different area.
Exit the elevator and follow the path to your left. Continue along the path until you reach a building. Jump onto the roof and follow it around, keeping to the left and away from the edge. The Deathclaw Egg is located in the far corner as part of a picnic scene.

Skyline Valley
Vault 63
Atrium Upper Level
Deathclaw Egg (1)
Cranberry Bog
None
The Mire

Abandoned Waste Dump
External
Deathclaw Egg (1)
Deathclaw Nests (2)
From the fast travel point, walk forward and jump over the gate.
From the fast travel point, walk forward and jump over the gate. Head toward the back of the truck, keeping the trailer on your left. On your right, you’ll see a dead brahmin and a radiation barrel. The first Deathclaw nest is located behind the brahmin.

Continue following the trailer until you reach the cab of the truck. In front of you will be a dead Yao Guai. Behind it is a Deathclaw nest and a Deathclaw egg.

Abandoned Waste Dump
Internal
Deathclaw Egg (1)
Deathclaw nests (3)
3% to 6% chance to spawn Deathclaw Eggs
Once you enter the cavern, walk past the rad barrels and stop at the bottom of the ramp. Turn left and keep the wall to your left-hand side the whole time you are in the cavern.
It will lead you to the three Deathclaw nests in turn.
Deathclaw nest # 1

Deathclaw nest # 2

Deathclaw nest # 3
The last Deathclaw nest has a fixed spawn Deathclaw egg next to it.


Thunder Mountain Power Plant
Deathclaw nest (1)
3% to 6% chance to spawn Deathclaw Eggs
From the fast travel point, follow the road south until you reach the end of the limo. Turn left, pass the tank, and enter the workshop yard. Continue straight along the road until you reach the green shipping containers near the water’s edge. Jump over the railing and keep the concrete wall on your right as you follow it along.
At the end of the wall, line yourself up between south and the Braxson’s Quality Medical Supplies map icon, then walk forward along the riverbank. As the bank begins to curve, look to your right for the Deathclaw nest.


Ella Ames' Bunker
Deathclaw nest (1)
3% to 6% chance to spawn Deathclaw Eggs
Stand at the door of Ella Ames’s Bunker and look toward the blue ute in the water ahead of you. Behind the ute are four trees arranged in a loose semicircle. Starting from the left, head toward the third tree. Stand behind it and look for a tree stump and a light-coloured tree with red leaves in front of you.
Run to the red-leafed tree, then turn south and walk to the river’s edge. Turn left and follow the riverbank. Just past the curve in the bank, you’ll find the Deathclaw nest on your right.

Burning Springs

Dino Peaks Mini Golf
External
Deathclaw Egg (2)
Deathclaw Nest (6)
3% to 6% chance to spawn Deathclaw Eggs
From the spawn-in location, face north and run forward, stopping just past the Welcome to Dino Peak entrance sign. Turn left and walk over to the Hole 1 sign.
Line yourself up with the Hole 1 putting green and follow it to the end.
Face north, go up the stairs, and stop at Hole 2. Turn northwest, and you’ll see Hole 3. Walk over to Hole 3 and follow the putting green to the end. This is the first Deathclaw nest. A Deathclaw Egg can also spawn on top of this nest.

Stand on top of the nest above and face north. Take a few steps forward, and you’ll be standing on the next Deathclaw nest. This nest can be partially covered by dirt depending on how the Deathclaw exits, so you may need to move your cursor around slightly to find the inventory window.

Stand on the nest above and face east. Go up the stairs and follow the blood trail to a small sign with an arrow. Continue up the stairs directly in front of you. At the top of the stairs is another Deathclaw nest. This one is also covered in dirt, so you’ll need to move your cursor around a bit to interact with it.

Stand on top of the nest above and face east. Walk forward and stop at the Deathclaw nest at the end of Hole 5. A Deathclaw Egg can also spawn on top of this nest.

Stand on top of the nest above and face south. Walk forward and stop at the bottom of the stairs. Turn left and take a few steps forward to reach the next Deathclaw nest. This one is also covered in dirt, so wave your cursor around like the world is about to end… wait…

Stand on top of the nest above and face southwest. Walk over to the start of Hole 6 directly in front of you. Follow the putting green to the end to find the final Deathclaw nest in this area.

Ash Cave
External
Deathclaw Egg (1)
From the spawn in location, line yourself up with the Ash Cave map marker and run straight up the hill. Continue running forward and stop at the top of the stairs. Veer right and continue to follow the path straight (North-ish) until you reach the pond. Turn right and enter the small cave. The deathclaw egg will be against the North wall, behind the Brain Fungus and near the bobblehead spawn.


The Rust Kingdom
External
Deathclaw Egg (1)
From the spawn-in location, face southwest and run straight until you reach the cliff wall in the distance. Once you reach the cliff face, turn left and use the machinery in front of you to climb up to the rock ledge above.
After reaching the ledge, face north. The Deathclaw Egg will be directly in front of you.

Love your food buffs? We’ve got you covered.
Buffs n Brew is a community built around food buff farming, crafting, and sharing knowledge. Whether you’re looking to stock up or learn the best ways to boost your build, we’re here to help.
Buffs n Brew XBOX
Buffs n Brew PC
Buffs n Brew PlayStation

Hi, I'm Kat or Duchess
I'm an Australian data miner who writes farming, event, and food buff guides for Fallout 76.
I believe that all knowledge and information should be free, which is why my guides will never be locked behind a paywall. However, running a website and photo and video editing software does not come cheaply.
So, If you found my guides helpful, please consider buying me a ko-fi (coffee) using the link below.
All monies go towards the tools for writing my guides and maybe for an actual cup of coffee or 3 ;)
Alternatively, share my guides with your fellow vault dwellers and help them to survive the wasteland.